How to Find Bed Bugs With a Flashlight (2026)
A bright flashlight is the most useful bed bug detection tool. Learn how to use one to inspect seams, crevices, and harborages, what to look for, and the techniques that reveal hidden bed bugs.
Disclosure: As an Amazon Associate we earn from qualifying purchases. Some links on this page are affiliate links: they cost you nothing extra and do not change what we write. Read our affiliate disclosure.
When it comes to detecting bed bugs, one tool stands out, so it helps to know how to find bed bugs with a flashlight. The short answer is that a bright flashlight is the single most useful bed bug detection tool, because it lets you see into the dark cracks, seams, and crevices where bed bugs hide — and using it well means inspecting methodically, holding the light at the right angle, and knowing what to look for (live bugs, pale eggs, shed skins, and dark fecal spots). With good technique, a flashlight reveals bed bugs that are otherwise hidden from view.
This matters because bed bugs are small, flat, and tuck into tight, shadowed spaces, so without good light you simply cannot see them — many infestations are missed for lack of proper inspection. A flashlight, used correctly, is what turns a vague suspicion into a confirmed finding (or reassurance). Learning the technique — where to shine, how to angle the light, and what the signs look like — makes your inspections far more effective.
In this guide you will learn why a flashlight is so useful, what kind to use, the technique (angle, methodical coverage), where to shine it, what to look for, and how to combine it with other tools. We will use clear tables and finish with a checklist. 💚
- How to Find Them With a Flashlight: Quick Answer
- Why a Flashlight Is So Useful
- Choosing a Flashlight
- The Inspection Technique
- Using the Light at an Angle
- Where to Shine It
- Where to Inspect, in Order
- What to Look For
- Signs Under the Flashlight
- Combining With Other Tools
- Common Mistakes (and Fixes)
- Expert Pro Tips
- FAQs
- Final Verdict + Checklist
How to Find Them With a Flashlight: Quick Answer
The quick answer is that a bright flashlight is the single most useful bed bug detection tool, because it lets you see into the dark cracks, seams, and crevices where bed bugs hide. Use it methodically — inspecting the bed first, then outward — hold the light at a low angle to cast shadows that reveal bugs and stains, and look for live bugs (small, flat, reddish-brown), pale eggs, translucent shed skins, and dark, ink-like fecal spots. With good technique, a flashlight reveals bed bugs that are otherwise hidden.
So the keys are a bright light, methodical coverage, the right angle, and knowing the signs. A flashlight turns a vague suspicion into a confirmed finding or reassurance. Our guide on finding bed bugs covers inspection broadly.
A bright flashlight is the most useful bed bug detection tool. Inspect methodically, hold the light at a low angle to cast shadows, and look for live bugs, pale eggs, shed skins, and dark fecal spots.
Why a Flashlight Is So Useful
A flashlight is so useful because bed bugs hide in dark, tight spaces — the seams of a mattress, the cracks of a frame, behind baseboards, in crevices — that are simply too shadowed to see into without bright, directed light. Bed bugs are also small and flat, so they tuck into narrow gaps where ambient room light never reaches. A focused beam illuminates these hiding spots, making the bugs and their signs visible.
Without a flashlight, inspections are guesswork; with one, you can actually see the seams, crevices, and harborages clearly. The directed beam also lets you angle light to reveal texture and shadows (covered below), making small bugs, eggs, and stains stand out. So the flashlight is the foundation of any bed bug inspection, professional or do-it-yourself — it is what makes the hidden visible.
So a flashlight is essential because bed bugs hide in dark, tight crevices that ambient light cannot reach, and a focused beam makes them and their signs visible. Our guide on where bed bugs hide covers the dark crevices.
Choosing a Flashlight
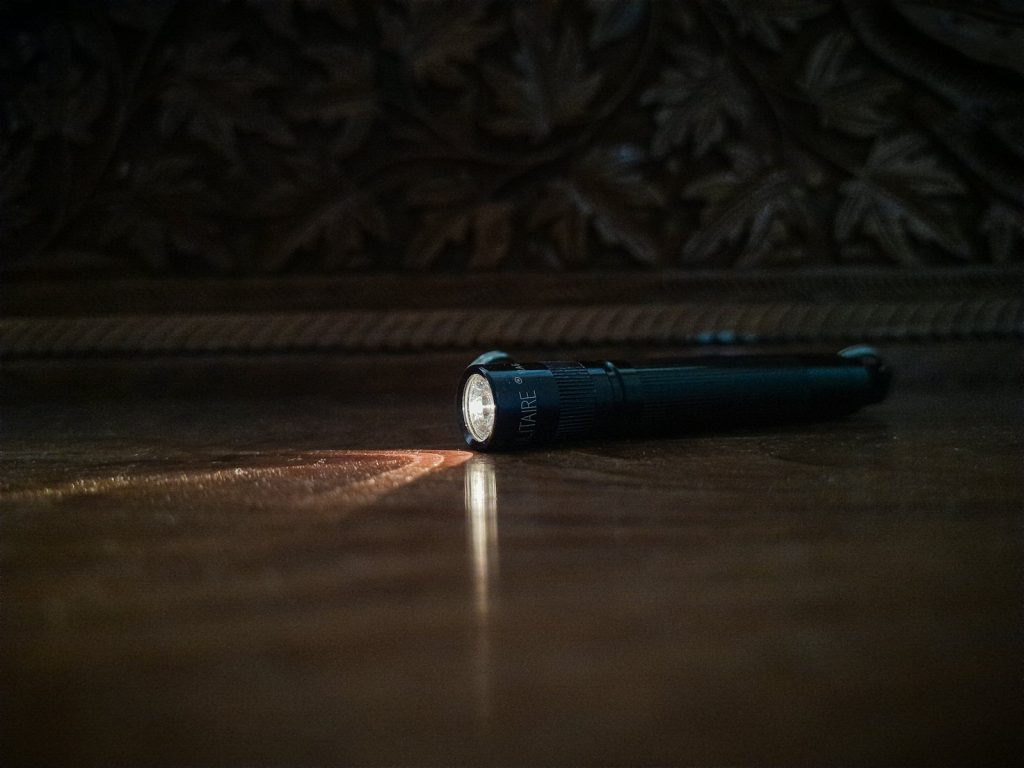
For bed bug inspection, choose a bright flashlight with a focused beam. A strong LED flashlight works well — bright enough to clearly light up crevices, with a beam you can direct into seams and gaps. A smaller handheld or penlight is convenient for getting close to tight spots, while a larger flashlight gives more brightness. Some people use a dedicated detection flashlight, and certain inspectors use specialized lights, but a good bright LED is sufficient for most.
What matters most is brightness and a directable beam, so you can illuminate the depths of seams and cracks. A flashlight you can hold at various angles and bring close to surfaces is ideal. While the phone flashlight can work in a pinch, a dedicated bright flashlight is better for thorough inspection, giving you more light and control. A magnifier alongside helps confirm tiny eggs.
So choose a bright LED flashlight with a focused, directable beam — brightness and control matter most for lighting up crevices. A dedicated detection flashlight (view options on Amazon) is made for this. Our guide on inspecting with tools covers equipment.
The Inspection Technique
Use a methodical technique rather than a random scan. Start at the bed (the most common harborage) and work outward in order: mattress seams and tufts, box spring, bed frame, headboard, then nearby furniture, then baseboards and other crevices. Move the light slowly and systematically along each surface, section by section, so you do not miss spots. Take your time — thorough inspection is slow and careful, not a quick glance.
For each area, shine the light directly into the seams, cracks, and gaps, and use a thin card or probe to open tight seams so the light reaches inside. Inspect both the obvious surfaces and the hidden ones (undersides, backs, and the inside of crevices), turning or tipping items as needed. Working in a consistent order ensures complete coverage and makes it easy to track what you have checked.
So inspect methodically from the bed outward, moving the light slowly along each surface and into every seam and crevice, using a probe to open tight gaps. A thin card or probe helps; our guide on finding bed bugs covers the systematic approach.
Using the Light at an Angle
A key technique is holding the flashlight at a low, oblique angle to the surface rather than straight on. Shining the light at an angle casts shadows across the texture of a surface, which makes small, low-profile things — like flat bed bugs, tiny eggs, and slight fecal spotting — stand out in relief, where straight-on light might wash them out. This raking light reveals bumps, bugs, and stains that flat lighting hides.
So as you inspect, vary the angle of the light, using a low, grazing angle along seams and surfaces to catch the shadows of any bugs or signs. This is a trick professionals use, and it noticeably improves detection of small or subtle signs. Combine it with looking from different viewing angles too, so you see the surface and its shadows from more than one direction.
So hold the light at a low, oblique angle to cast shadows that make small bugs, eggs, and stains stand out — raking light reveals what flat lighting hides. Our guide on spotting early signs covers seeing subtle evidence.
Where to Shine It
Shine the flashlight where bed bugs hide, in priority order. Start with the mattress seams, piping, and tufts; then the box spring (including under the fabric edges); the bed frame joints, slats, and screw holes; the headboard and where it meets the wall; and the immediate surroundings. Then expand to nearby furniture (nightstands, dressers, chairs), baseboards, carpet edges, wall and floor cracks, behind picture frames and outlet covers, and curtains.
Focus the beam into the tight, dark spots — the seams, cracks, joints, and crevices — rather than just the open surfaces, since that is where bugs hide. Get the light close and direct it into the depths of each gap. The bed and its immediate area are the highest priority, with the inspection expanding outward following how infestations spread. Cover the high-probability spots thoroughly.
So shine the light into the seams, cracks, joints, and crevices, starting at the bed and expanding outward to furniture, baseboards, and other harborages. Our guide on where bed bugs hide covers the spots.
Where to Inspect, in Order
| Order | Area |
|---|---|
| 1 | Mattress seams, piping, tufts |
| 2 | Box spring (under fabric edges) |
| 3 | Bed frame joints, slats, screw holes |
| 4 | Headboard and wall junction |
| 5 | Nearby furniture (nightstand, dresser) |
| 6 | Baseboards, cracks, behind frames/outlets |
Work from the bed outward, shining the light into the seams and crevices of each area in turn.
What to Look For
Under the flashlight, look for the signs of bed bugs: live bugs (small, flat, oval, reddish-brown, about apple-seed-sized as adults, paler when young), pale or translucent eggs (about 1mm, glued in clusters), translucent shed skins (empty exoskeletons), and dark, ink-like fecal spots (small dots of digested blood, often along seams and in harborages). You may also see reddish blood smears. Any of these indicates bed bugs.
The most reliable confirmations are live bugs and clustered fecal spotting, shed skins, or eggs in the harborages. A single ambiguous mark is not conclusive, while clustered signs in the seams confirm an infestation. Knowing what each sign looks like — and using the angled light to make them stand out — lets you interpret what the flashlight reveals. Look closely, using a magnifier for the tiny eggs.
So look for live bugs, pale eggs, translucent shed skins, dark fecal spots, and blood smears — with live bugs and clustered fecal spotting the strongest confirmation. Our guide on what bed bugs and their signs look like covers identification.
Signs Under the Flashlight
| Sign | Appearance |
|---|---|
| Live bugs | Flat, oval, reddish-brown, apple-seed-sized (adults) |
| Eggs | Pale, ~1mm, glued in clusters |
| Shed skins | Translucent empty exoskeletons |
| Fecal spots | Dark, ink-like dots along seams |
| Blood smears | Small reddish/rust marks |
Live bugs and clustered fecal spotting are the strongest confirmation — angled light makes them stand out.
Combining With Other Tools
A flashlight works best combined with a few other tools. A magnifying glass helps confirm the tiny eggs and young nymphs the flashlight reveals. A thin, rigid card or probe opens tight seams so the light (and your view) reaches inside. Interceptor traps under the bed legs catch bugs over time, complementing the flashlight’s point-in-time inspection. Together, these make detection more thorough.
The flashlight is the centerpiece — it makes things visible — while the magnifier confirms small details, the probe accesses crevices, and interceptors provide ongoing monitoring. For a hard-to-find or low-level infestation, this combination (and, if needed, a professional or canine inspection) gives the best chance of detection. So pair your flashlight with these tools for the most effective inspection.
So combine the flashlight with a magnifier, a probing card, and interceptor traps for thorough detection — the flashlight reveals, the others confirm and monitor. A set of interceptor traps (see options on Amazon) adds ongoing monitoring. Our guide on interceptor traps covers monitoring.
When to Inspect: Day or Night?
You can inspect with a flashlight any time, because the flashlight provides the light you need regardless of the room’s lighting — you are looking for the bugs and their signs in their hiding spots, not waiting for them to come out. So a thorough daytime inspection with a flashlight is perfectly effective, since bed bugs hide in their harborages during the day where the light reveals them.
Some people also do a nighttime check (bed bugs are most active in the pre-dawn hours), quietly shining the flashlight on the bed to try to catch bugs out and feeding — which can occasionally spot active bugs. But this is supplemental; the reliable approach is the methodical daytime inspection of the harborages with the flashlight, which finds the bugs and signs where they hide. So inspect thoroughly by day, and optionally do a quick night check.
So inspect thoroughly with the flashlight by day in the harborages (effective regardless of room light), with an optional supplemental night check for active bugs. Our guide on when bed bugs are active covers their timing.
Special Lights and Detection Aids
Beyond a standard bright flashlight, some inspectors use special lights as aids. A few use ultraviolet (UV) lights, since some bed bug evidence can fluoresce under UV — though this is supplemental and a normal bright flashlight remains the primary tool, as UV does not make bugs glow in a simple, reliable way for everyone. The key tool is still a strong white-light flashlight used with good technique.
The most valuable “aid” is actually technique and the companion tools already covered — the angled light, a magnifier, a probing card, and interceptors — rather than fancy lights. So do not feel you need specialized equipment; a good bright flashlight, used methodically and at the right angle, plus a magnifier and probe, is what finds bed bugs. Specialized lights are optional extras, not requirements.
So a standard bright flashlight with good technique is the primary tool; specialized lights like UV are optional supplements, not requirements. A bright detection flashlight (view options on Amazon) is the essential piece. Our guide on bed bugs and UV light covers special lights.
Common Mistakes (and Fixes)
- Mistake: Inspecting without enough light. Fix: use a bright, focused flashlight — ambient light is not enough.
- Mistake: Shining straight-on only. Fix: use a low, oblique angle to cast shadows and reveal small signs.
- Mistake: A quick, random scan. Fix: inspect methodically from the bed outward, section by section.
- Mistake: Only checking open surfaces. Fix: shine into seams, cracks, and crevices, using a probe to open them.
- Mistake: Not knowing the signs. Fix: learn what bugs, eggs, shed skins, and fecal spots look like.
Expert Pro Tips
- Brightness and a focused beam. Light up the depths of crevices.
- Rake the light at a low angle. Shadows reveal small bugs and stains.
- Go bed-first, methodically. Cover every harborage in order.
- Open the seams. Use a card so the light reaches inside.
A bright flashlight is your best bed bug detector — but technique matters. Rake the light at a low angle, inspect the seams and crevices methodically from the bed outward, and learn the signs.
Real-Life Scenarios
The angled light. Mara saw nothing with straight-on light, but holding the flashlight at a low angle revealed fecal spots and a bug in relief along the mattress seam — the shadows made them visible.
The methodical sweep. Working bed-first and section by section, Tom found bugs in the box spring corner he would have skipped in a random scan.
The probe and light. Dana used a card to open a tight frame joint and shone the light inside, finding eggs the closed seam had hidden.
Frequently Asked Questions
How do I find bed bugs with a flashlight?
Use a bright, focused flashlight and inspect methodically from the bed outward — mattress seams, box spring, frame, headboard, then nearby furniture and baseboards. Shine the light into the seams, cracks, and crevices (using a card to open tight ones), hold it at a low angle to cast shadows that reveal small signs, and look for live bugs, pale eggs, shed skins, and dark fecal spots. Take your time and cover every harborage.
What kind of flashlight is best for finding bed bugs?
A bright LED flashlight with a focused, directable beam — bright enough to clearly light up crevices and easy to angle into seams and gaps. A dedicated detection flashlight works well, and a smaller handheld is convenient for tight spots. Brightness and beam control matter most. A phone flashlight can work in a pinch, but a dedicated bright flashlight gives better light and control for thorough inspection.
Why does the angle of the light matter?
Holding the flashlight at a low, oblique angle casts shadows across a surface’s texture, making small, low-profile things — flat bed bugs, tiny eggs, and slight fecal spotting — stand out in relief, where straight-on light might wash them out. This raking light reveals bugs and stains that flat lighting hides, so varying the angle (and using a grazing angle along seams) noticeably improves detection.
Where should I shine the flashlight to find bed bugs?
Into the tight, dark spots where bugs hide, starting at the bed: the mattress seams, piping, and tufts; the box spring under its fabric edges; the frame joints, slats, and screw holes; the headboard and wall junction; then nearby furniture, baseboards, carpet edges, wall and floor cracks, behind picture frames and outlet covers, and curtains. Focus the beam into the seams and crevices, not just the open surfaces.
What do bed bugs look like under a flashlight?
Live bugs appear as small, flat, oval, reddish-brown insects (about apple-seed-sized as adults, paler when young). You may also see pale or translucent eggs (about 1mm, glued in clusters), translucent shed skins (empty exoskeletons), and dark, ink-like fecal spots (small dots along seams). Reddish blood smears can appear too. Live bugs and clustered fecal spotting are the strongest confirmation.
Do I need other tools besides a flashlight?
A flashlight is the centerpiece, but a magnifying glass helps confirm tiny eggs and young nymphs, a thin card or probe opens tight seams so the light reaches inside, and interceptor traps under the bed legs provide ongoing monitoring between inspections. For a hard-to-find infestation, this combination — and, if needed, a professional or canine inspection — gives the best chance of detection.
Final Verdict + Checklist
How to find bed bugs with a flashlight: use a bright, focused LED flashlight as your primary detection tool, and inspect methodically from the bed outward — mattress seams, box spring, frame, headboard, then nearby furniture, baseboards, and other crevices. Shine the light directly into the seams, cracks, and gaps (using a thin card to open tight ones), and hold it at a low, oblique angle to cast shadows that make small bugs, eggs, and fecal spots stand out. Look for live bugs (flat, reddish-brown), pale clustered eggs, translucent shed skins, and dark, ink-like fecal spots — with live bugs and clustered fecal spotting being the strongest confirmation. Combine the flashlight with a magnifier, a probe, and interceptor traps for thorough detection, and consider a professional or canine inspection for hard-to-find cases. Good light plus good technique is what reveals hidden bed bugs.
- Use a bright LED flashlight with a focused beam
- Inspect methodically from the bed outward
- Shine the light into seams, cracks, and crevices
- Hold the light at a low, oblique angle for shadows
- Use a card to open tight seams so light reaches inside
- Look for live bugs, eggs, shed skins, and dark fecal spots
- Use a magnifier for tiny eggs
- Add interceptors for ongoing monitoring
This guide is educational and prevention-focused. It does not provide medical advice. For established infestations, consider a licensed professional. Some links may earn us a small commission at no extra cost to you.
Further reading from public agencies
These are United States agencies. If you are elsewhere, check your national or local public-health or pest-control authority. This article is general information, not medical advice or a diagnosis.